
How to Calculate the Right Crane Size for Your Construction Project
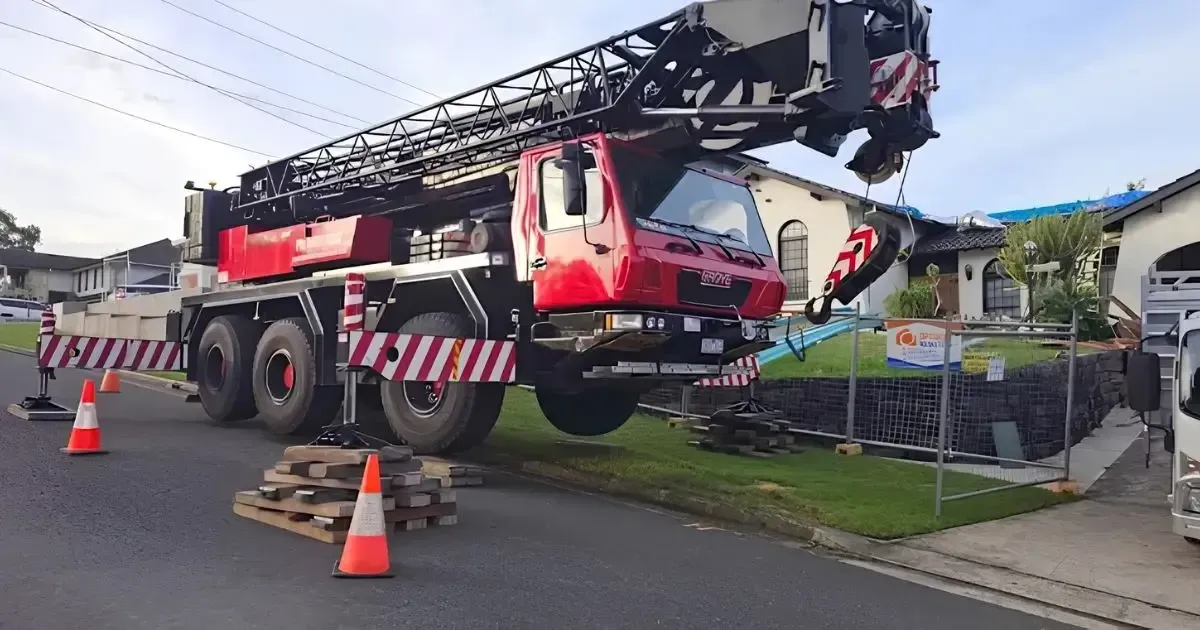
Choosing the right crane for a construction project involves more than matching the crane's rated capacity to the weight of the load.
The required crane depends on the total lifted load, working radius, required height and reach, crane configuration, and site conditions.
For an initial assessment, determine the complete lifted load and working radius, then calculate the load moment. The final crane selection must be verified against the manufacturer's load chart for the specific crane and configuration.
Key Takeaways
- Crane size is not determined by load weight alone. Radius, reach, configuration and site conditions also affect the selection.
- The total lifted load includes the load and applicable lifting equipment that the crane must carry.
- Working radius is the horizontal distance from the crane's centre of rotation to the load's centre of gravity.
- Load moment = load × working radius and provides a useful preliminary indication of how weight and reach interact.
- A crane's advertised maximum tonnage does not mean it can lift that amount at every radius.
- The manufacturer's load chart or rated capacity chart is the key reference for confirming the crane's capacity at a particular configuration.
- Ground conditions, access, crane position, overhead hazards, underground services and weather can affect crane selection and operation.
What Determines the Right Crane Size?
The main factors are:
| Factor | What it means | Why it matters |
|---|---|---|
| Load weight | Complete weight carried by the crane | Determines the lifting capacity required |
| Working radius | Horizontal distance from the crane's centre of rotation to the load | Available capacity generally changes as radius increases |
| Lift height and reach | Height and distance the load must travel | Affects boom length, configuration and clearance |
| Crane configuration | How the crane is set up and operated | Rated capacity varies between configurations |
| Site conditions | Ground, access, space, hazards and environment | Determines whether the crane can be positioned and operated appropriately |
NSW Government guidance recommends considering factors such as rated lifting capacity, site access, ground bearing pressure, crane position, boom considerations, underground and overhead services, and environmental conditions when selecting a crane.
How Do You Calculate the Right Crane Size?
There is no single formula that determines the correct crane size for every construction lift.
A practical preliminary process is:
Determine the total lifted load → measure the working radius → calculate the load moment → determine the required height and reach → verify the crane using its load chart.
The calculation helps establish the lifting requirement. The load chart confirms whether a particular crane can perform the lift in its planned configuration.
1. Determine the Total Lifted Load
The total lifted load is the complete weight that the crane must carry during the lift. This may include the load itself as well as applicable lifting equipment, such as slings, shackles, spreader beams and
other attachments.
For example, if equipment weighs 10 tonnes and the applicable lifting equipment adds 0.5 tonnes, the lifting arrangement involves a total of 10.5 tonnes before considering any other chart-specific requirements.
Use verified load weights wherever possible. It is also important to
check the crane's load chart
to determine whether items such as the hook block and lifting slings are already included in the rated capacity or need to be accounted for separately.
Safe Work Australia's crane guidance explains how these items may be treated when checking a crane's rated capacity.
2. Measure the Working Radius
The working radius is the horizontal
distance between the crane's centre of rotation and the load's centre of gravity at the relevant point of the lift.
It is a critical measurement because a crane's available lifting capacity generally changes as the working radius changes. Load charts specify capacity for particular radius and configuration combinations.
Measure the planned radius at the important stages of the lift, including the pickup and final placement positions.
The most demanding position may determine the crane configuration required for the job.
3. Calculate the Load Moment
Load moment shows the relationship between the load weight and its horizontal distance from the crane.
Formula
Load Moment = Load × Working Radius
For example:
Load = 12 tonnes
Working radius = 20 metres
12 × 20 = 240 tonne-metres
The calculated load moment is therefore 240 tonne-metres.
This calculation is useful for understanding why increasing the load or radius increases the lifting demand.
However, it does not mean you can simply choose a crane based on a 240-tonne rating or a generic tonne-metre figure.
The actual crane capacity must be confirmed using the manufacturer's load chart.
4. Determine the Required Height and Reach
The crane must be able to reach the final placement position while operating within its rated limits.
Consider:
- Starting elevation
- Final placement elevation
- Building height
- Roof structures
- Parapets
- Scaffolding
- Plant and equipment
- Required clearance over obstacles
Height and radius should be assessed together because achieving greater reach may require a different boom length or crane configuration.
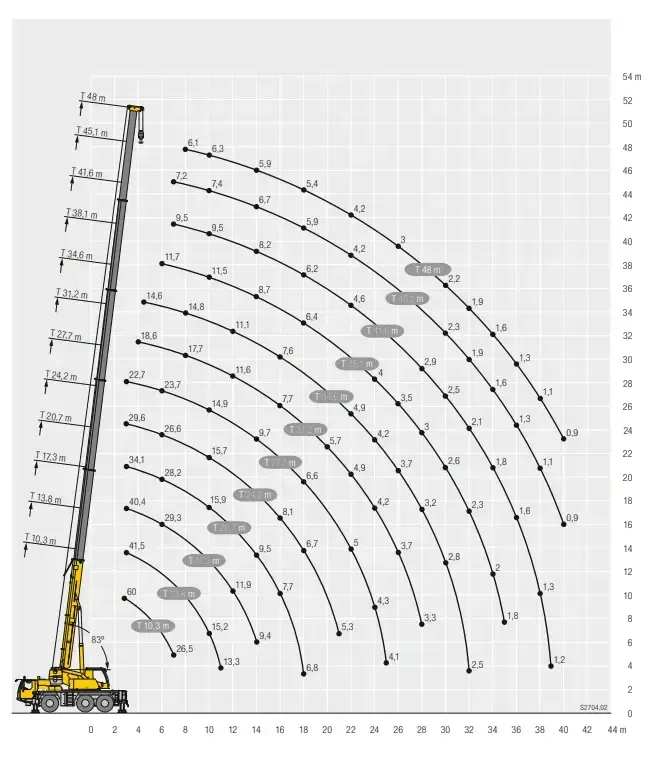
5. Verify the Crane Using the Load Chart
A
load chart, also called a rated capacity chart, shows how much a particular crane can lift under specified operating conditions.
It is the key reference for confirming whether a crane can safely perform a planned lift at the required radius and configuration.
Safe Work Australia's crane-specific load chart guidance
explains that lifting capacity can vary according to factors such as boom extension, boom angle and the crane's operating configuration.
Depending on the crane, the applicable chart can account for factors such as:
- Working radius
- Boom length
- Boom angle
- Outrigger configuration
- Counterweight
- Fly jib configuration
- Pick-and-carry operation
- Rope and reeving arrangements
- Hook block configuration
The exact factors vary by crane and chart.
To verify the crane:
- Identify the crane model.
- Identify the planned operating configuration.
- Find the applicable load chart.
- Locate the required boom configuration and working radius.
- Check the rated capacity at that combination.
- Account for any load-chart requirements relating to the hook block, lifting gear or other equipment.
- Confirm the planned lifted load does not exceed the applicable rated capacity.
The manufacturer's rated capacity should not be exceeded.
Why Crane Tonnage Alone Can Be Misleading
A crane's advertised capacity is not necessarily its capacity at the working radius you need.
For example, calling a crane a 50-tonne crane does not mean it can lift 50 tonnes at every position on the site.
The more useful question is:
How much can this specific crane lift at the required radius and configuration?
This is why crane selection should be based on the applicable load chart rather than the headline tonnage alone.
How Site Conditions Affect Crane Selection
The crane also needs to be suitable for the physical conditions of the worksite.
Ground Conditions
The crane needs a suitable standing and operating surface. Ground conditions, slopes and changes in the supporting surface can affect crane stability and rated capacity.
Crane Position and Setup Space
The available space affects where the crane can be positioned and how the lift can be carried out.
For cranes using outriggers, there must also be adequate space for the required setup.
Site Access
The crane must be able to reach the worksite and move into its planned operating position where required.
Overhead and Underground Services
Powerlines, buildings, trees and other structures can restrict boom or load movement. Underground services can also affect where a crane can safely be positioned. NSW guidance specifically identifies both overhead and underground services as planning considerations.
Weather and Environmental Conditions
Wind, storms and other environmental conditions can affect crane operations and need to be considered during planning.
Which Type of Crane Should You Choose?
Crane capacity is only part of the decision. The type of crane also needs to suit the lifting method and worksite.
| Crane type | Typical application |
|---|---|
| Franna crane | Pick-and-carry work where the crane needs to lift and move suitable loads around the site |
| City crane | Urban and restricted-access sites where compact setup is important |
| All-terrain crane | Larger lifts requiring greater capacity, reach and road-to-site mobility |
| Rough-terrain crane | Suitable off-road construction environments |
| Tower crane | Longer-duration projects requiring repeated lifting at significant heights |
The appropriate crane depends on the actual load, reach, site conditions and operating requirements.
Common Crane Sizing Mistakes
Choosing a Crane Based Only on Load Weight
A load's weight does not determine the required crane by itself. The working radius, reach and configuration also affect the available capacity.
Estimating the Working Radius
An inaccurate radius can result in selecting a crane that does not have enough capacity at the actual lifting position.
Leaving Lifting Equipment Out of the Calculation
Slings, spreader beams, hook blocks and other applicable equipment may need to be accounted for when determining the effective load against the crane's rated capacity. Check the specific load chart.
Ignoring the Crane Configuration
Rated capacity can change with boom length, boom angle, counterweight, outrigger setup and other configuration details. Always use the load chart applicable to the planned setup.
Selecting the Crane Before Assessing the Site
A crane with sufficient lifting capacity may still be unsuitable if the site cannot accommodate its access, setup, ground or clearance requirements.
When Is Detailed Crane Planning Needed?
A basic load-and-radius calculation is useful for preliminary planning, but it does not replace a proper assessment of the lift.
More detailed planning may be required for lifts involving:
- Heavy or unusual loads
- Long working radii
- Restricted access
- Challenging ground conditions
- Limited setup areas
- Overhead or underground hazards
- Tandem or multiple-crane lifts
- Complex lifting paths
- Operations close to rated capacity or stability limits
NSW guidance identifies factors such as rated capacity, ground conditions, crane position, services and environmental conditions as part of lift planning, while Safe Work Australia emphasises using the crane-specific load chart and manufacturer information.
When requesting
crane hire, provide the load weight and dimensions, pickup and placement locations, required height, working radius and relevant site information.
Choosing the Right Crane for Your Project
The right crane is determined by the
load, working radius, required height and reach, crane configuration and site conditions.
Start by establishing the complete lifted load and working radius. Calculate the load moment to understand the relationship between weight and reach, then use the manufacturer's load chart to confirm the crane's rated capacity for the planned configuration.
For construction projects in Sydney,
BIGLIFT CRANES provides mobile crane hire with a fleet ranging from
16-tonne city cranes to 130-tonne heavy-lift cranes, including a
20-tonne Franna crane.
If you are unsure which crane configuration is suitable for your project, provide the load details, required lifting height, working radius and site conditions so the appropriate equipment can be assessed.